Showing posts with label tutorial. Show all posts
Wednesday, June 26, 2013
Popcorn Stitch Tutorial
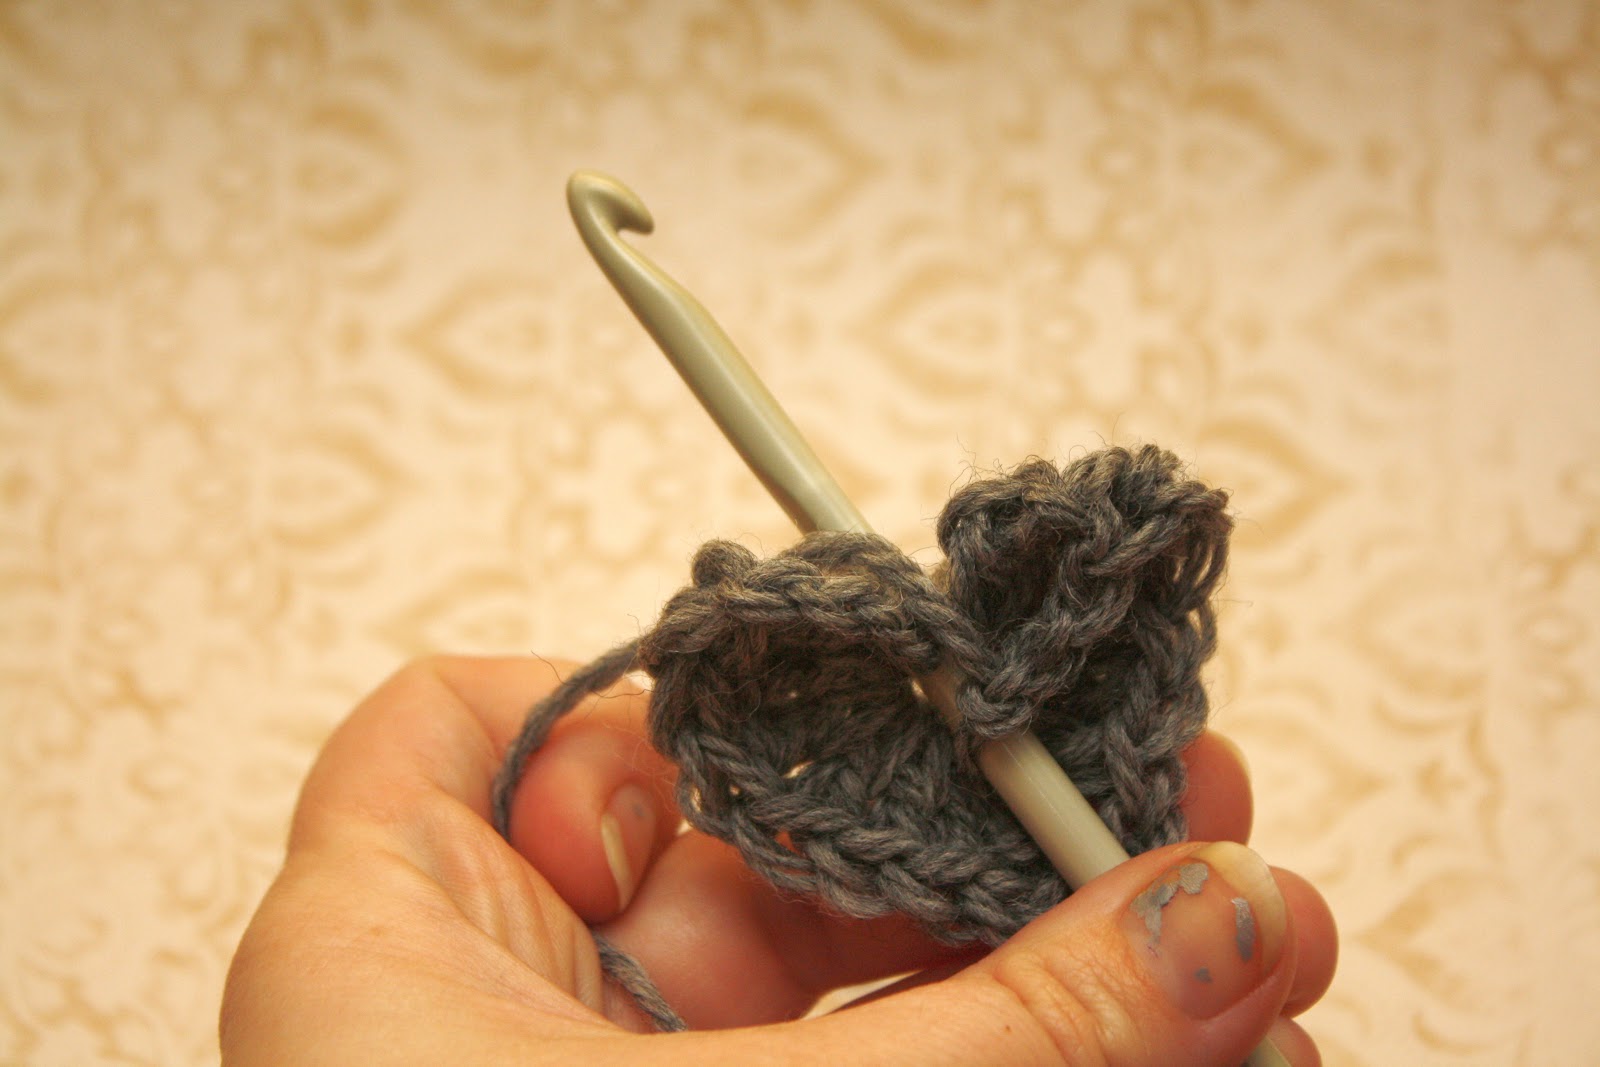
It has been a while since I last post a tutorial! I have been making a hat using popcorn stitch. I'm really happy with how it is turning out. Popcorn stitch is a textured stitch, and quite an easy and effective.
Generally speaking, popcorn stitch is done with 5dc and not 4 like I have done. Truthfully I was trying to use less yarn!
To make one popped corn, 4 dc. (4 tr for UK)
(The first popcorn of a round has 3ch and 3dc)
Remove hook from work. (While not necessary to pull a loop as large as I have done, it does help if it is bigger than usual)
Hook through the top of the first dc then back into last hook, pull back to normal size
Yarn over hook and through both loops
In the hat I am making I am putting one chain in between each popcorn, and each row is worked into that chain space of the previous row.
I've been working on this hat for a while now. I'm joining in with Crafty Mummy to finish a UFO (unfinished object!) This is my UFO! and it should be finished very soon.
Friday, January 11, 2013
Woolies for Tassie - granny squares
You may have heard of the devastating fires in Tasmania. The Craft Hive has set up a drive to get knitted and crocheted square together to make blankets for the families that have lost everything.
If you are unable to participate, maybe you can spread the word to someone who can.
They are after 8 inch squares in 8 ply yarn. Acrylic, wool, or blended, but please label them.
for more information, click here: The Craft Hive
I'm going to be sending some granny squares, here is a pattern for an 8 inch square if you need it: (using US terms) I've posted other Granny Square tutorials, but this is now my favourite method. (note, you don't need to use this pattern, if you are sending them off, any 8inch square will do)
(US dc = UK tr)
(US dc = UK tr)
Start with either a magic loop or chain 4 and join with sl st in first chain, (using the red yarn.)
*3 dc into centre and 3 chains. repeat from * two more times
2dc into centre and slip stich into top of third chain from beginning.
2nd round: 6 chains, and into same corner space 3dc and 2 chains {this square has a 2 space gap between each 3 dc cluster and a 3 chain gap in each corner}
*3 dc, 3 chains, 3dc, 2 chains into next corner space. repeat from * two more times
2dc into first corner space and sl st into 3rd chain. Fasten off.
3rd round (using brown yarn): 6 chains, then into same corner space 3dc and 2 chains
*3dc into next space, 2 chains
3dc into next corner space, 3 chains, 3dc into same corner space, 2 chains. Repeat from * 2 more times
2dc into first corner space, sl st into 3rd chain. fasten off
4th round (using red yarn): 6 chains, then into same corner space 3dc and 2 chains (pictured below)
*3dc into next space, 2 chains, 3dc into next space, 2 chains.
3dc into next corner space, 3 chains, 3dc into same corner space, 2 chains. Repeat from * 2 more times
2dc into first corner space, sl st into 3rd chain.
5th round: 6 chains, then into same corner space 3dc and 2 chains
*3dc into next space, 2 chains. 3dc into next space, 2 chains. 3dc into next space, 2 chains.
3dc into next corner space, 3 chains, 3dc into same corner space, 2 chains. Repeat from * 2 more times
2dc into first corner space, sl st into 3rd chain. Fasten off.
6th round: (using brown yarn) 6 chains, then into same corner space 3dc and 2 chains
*3dc into next space, 2 chains. repeat 3 more times
3dc into next corner space, 3 chains, 3dc into same corner space, 2 chains. Repeat from * 2 more times
2dc into first corner space, sl st into 3rd chain. Fasten off
7th round: (using red yarn) 6 chains, then into same corner space 3dc and 2 chains
*3dc into next space, 2 chains. repeat 4 more times
3dc into next corner space, 3 chains, 3dc into same corner space, 2 chains. Repeat from * 2 more times
2dc into first corner space, sl st into 3rd chain.
8th round: 6 chains, then into same corner space 3dc and 2 chains
*3dc into next space, 2 chains. repeat 5 more times
3dc into next corner space, 3 chains, 3dc into same corner space, 2 chains. Repeat from * 2 more times
2dc into first corner space, sl st into 3rd chain. Fasten off
Make a square in just one colour, or change at each row. Play around and you will end up with quite a few squares to donate.
| 1st Round Complete |
*3 dc, 3 chains, 3dc, 2 chains into next corner space. repeat from * two more times
2dc into first corner space and sl st into 3rd chain. Fasten off.
3rd round (using brown yarn): 6 chains, then into same corner space 3dc and 2 chains
*3dc into next space, 2 chains
3dc into next corner space, 3 chains, 3dc into same corner space, 2 chains. Repeat from * 2 more times
2dc into first corner space, sl st into 3rd chain. fasten off
| 3rd Round Complete |
| Corner Detail. Start each round off like this to avoid a bulky join. |
*3dc into next space, 2 chains, 3dc into next space, 2 chains.
3dc into next corner space, 3 chains, 3dc into same corner space, 2 chains. Repeat from * 2 more times
2dc into first corner space, sl st into 3rd chain.
5th round: 6 chains, then into same corner space 3dc and 2 chains
*3dc into next space, 2 chains. 3dc into next space, 2 chains. 3dc into next space, 2 chains.
3dc into next corner space, 3 chains, 3dc into same corner space, 2 chains. Repeat from * 2 more times
2dc into first corner space, sl st into 3rd chain. Fasten off.
| 5th Round Complete |
*3dc into next space, 2 chains. repeat 3 more times
3dc into next corner space, 3 chains, 3dc into same corner space, 2 chains. Repeat from * 2 more times
2dc into first corner space, sl st into 3rd chain. Fasten off
7th round: (using red yarn) 6 chains, then into same corner space 3dc and 2 chains
*3dc into next space, 2 chains. repeat 4 more times
3dc into next corner space, 3 chains, 3dc into same corner space, 2 chains. Repeat from * 2 more times
2dc into first corner space, sl st into 3rd chain.
8th round: 6 chains, then into same corner space 3dc and 2 chains
*3dc into next space, 2 chains. repeat 5 more times
3dc into next corner space, 3 chains, 3dc into same corner space, 2 chains. Repeat from * 2 more times
2dc into first corner space, sl st into 3rd chain. Fasten off
| 8 Rounds Complete |
Here is my other post on Granny Squares, but note this method uses a 3 chain gap between each 3 dc cluster. It does have a more detailed explanation of starting the first round. There is no right or wrong way to make a Granny Square, but you may need to adjust tension or add/subtract rows to get to an 8" square. As I said before, I now prefer the method in today's post.
Thanks for reading,
Emma
Thanks for reading,
Emma
Thursday, December 13, 2012
Joining as you go {tutorial}
Been a little while since I did a tutorial, here is an easy method to join motifs as you go, which reduces the amount of weaving in ends later! (hooray!)
This method should work for any motif, with a little planning. It helps if there is a chain space to work into where you join.
I used this free pattern for a for a flower coaster This tutorial is just for this particular technique, not a walk through the whole pattern :) The instructions are a little vague as it is intended to use on any motif.
What you need is two completed motifs (referred to as motif A and B- in green) ,and one that is one round from completion. (motif C -pink)
Work the final round of the motif C until you reach the chain space gap that you are joining. Place hook through gap of motif A. Then complete chain and continue pattern.
There you have one join! Continue to next chain space and repeat, by placing hook into chain space of motif A.
Continue final row until to reach the point where you are joining motif B. Place hook into the chain space before completing the chain
And then we have three joined motifs! Saves a lot of time and effort if you are planning on joining them later on!
And the final result:
I'm hanging up these for Christmas! so I'm also adding a chain, with slip stitches into each of the top bumps. I did 12 chains between each motif and 7 between the 'bumps'.
Enjoy!, I should get some photos up of them hung around the house!
Emma xx
Monday, September 17, 2012
Make a Frilly Heart - add a picot!
A picot is a pretty way to make a frilly edge. It is very easy to do and uses just chains and slip stitches.
Using these instructions to make the heart. Picot stitch makes a sweet border to any crochet project.
Insert the hook where you want the first picot. I don't like to start too close to the centre, I like to start in the 3rd Chain along:
Pull a loop of yarn through the chain:
3 chains:
Slip Stitch back into same stitch you started with:
Slip Stitch into the next two chains. I've also shown the tail end getting stitched in, to save weaving in ends later on:
3 Chains:
3 chains and slip stitch back into centre of heart, 3 chains and slip stitch into starting chain. Fasten Off.
And there you have it! Add a chain if you want to make a hanging ornament.
Friday, August 24, 2012
{crochet} A Heart
I've been holding off on more heart patterns since the original post, because I wanted to cover all the stitches needed, and these hearts use a few of them!
Now that I have a tutorial made for each stitch, I can take you through it step by step. I have linked back to the appropriate stitches,, just in case you need to refresh your memory. I'm starting to abbreviate more, to ease you into pattern reading.
Today's heart is the same one round heart that was my first ever blog post (here), and also includes a second round. I'm using up some spare wool from my side walk shawl. Its always a good idea to keep spare bits and pieces and use them up in projects like this. I have edited the photos a little, because they were a little dark.
I am using 8ply pure wool and a 5mm hook
Slip Knot, you may want to leave a shorter tail than usual.
Chain 4
I am using 8ply pure wool and a 5mm hook
Slip Knot, you may want to leave a shorter tail than usual.
Chain 4
All of the first round worked into last chain, next to the tail.
Three Trebles (or Triples!) (tr)- US
or
Three Double Trebles (dtr)- UK
Then, three doubles (dc)- US
or
three trebles (tr) UK
into the same stitch.
Chain 1, tr 1, chain 1 (US)
or
Chain 1, dtr 1, chain 1 (UK)
All into same stitch
3 dc, 3 tr (US)
or
3 tr, 3 dtr (UK)
3 chains
Slip stitch into centre of heart. (that sounds a bit rough!)
Round one complete, fasten off if this is required size or continue on.
Round 2: Chain 3
in the first tr/dc from previous row:
sc and dc (both into same loop) US
or
dc and tr (into same loop) UK
into next loop:
3 dc (US)
or
3 tr (UK)
2 dc (US)
or
2 tr (UK)
1 dc into each of the next 4 (US)
or
1 tr into each of next 4 (UK)
ch 1, tr 1. ch 1 (US)
or
ch1, dtr 1, ch 1 (UK)
1 dc into each of next 4 (US)
or
1 tr into each of next 4 (UK)
2 dc into next loop, 3 dc into next one after that (US)
or
2 tr into next loop, 3 tr into next one after that (UK)
1 dc and 1 sc into next loop (US)
or
1 tr and 1 dc into next loop (UK)
3 chains
Slip Stitch into centre of heart.
Fasten off
And there we have it! A heart in two rounds.
Using the same pattern you can experiment with different yarn and hook sizes to see what you like best.
Thanks for visiting. let me know how you go!
Subscribe to:
Posts (Atom)